ppModeler Arch tutorial
First, use the "Tube..." tool.
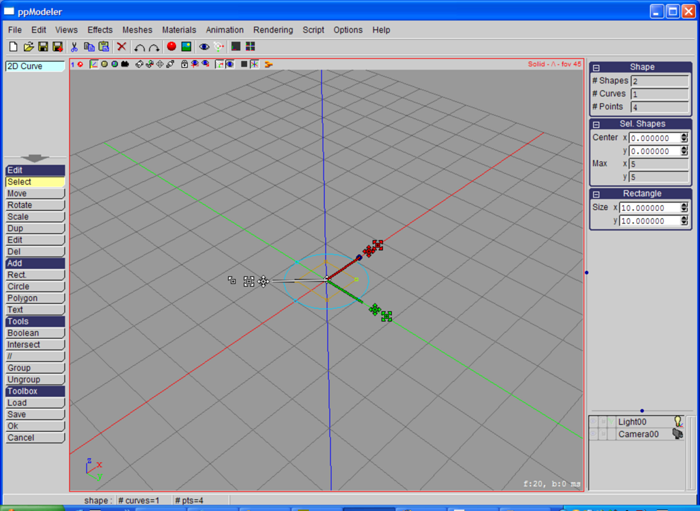
Add a rectangle and a circle:
Scale the retangle with the 2D manipulator:

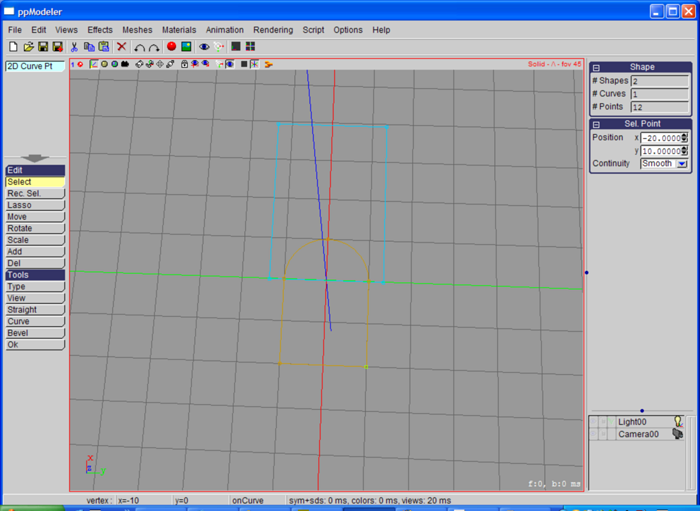
Select the circle and edit tool. This open the curve point edition toolbox:
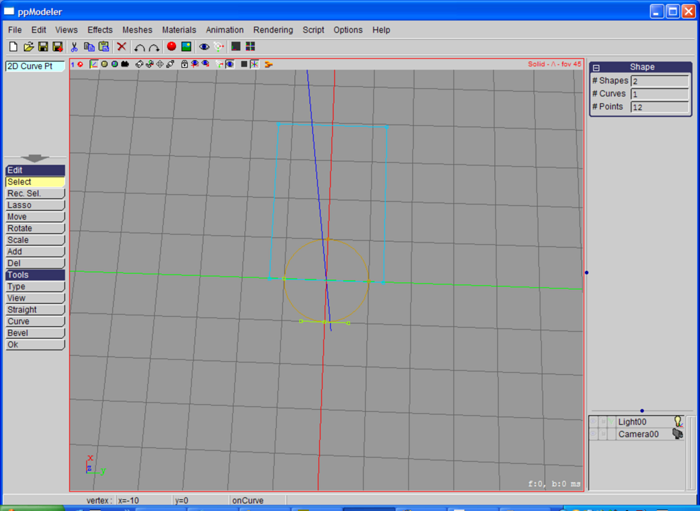
Select the left and bottom points, then "Straight" tool:
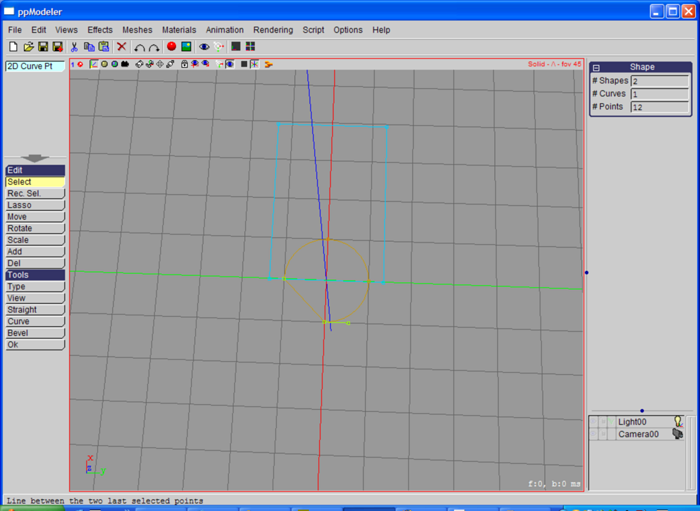
Select the right and bottom points, "Straight" tool:
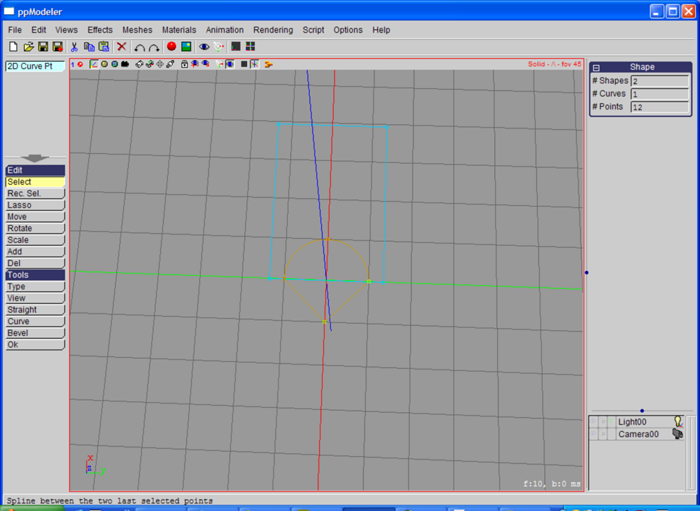
"Add" tool, click on one of the straight line.
Then, with the numeric position of the selected point,
move the two bottom points to (-20, -10) and (-20, 10):
"Ok" to exit the point toolbox. Move the circle and Select the circle and the rectangle:
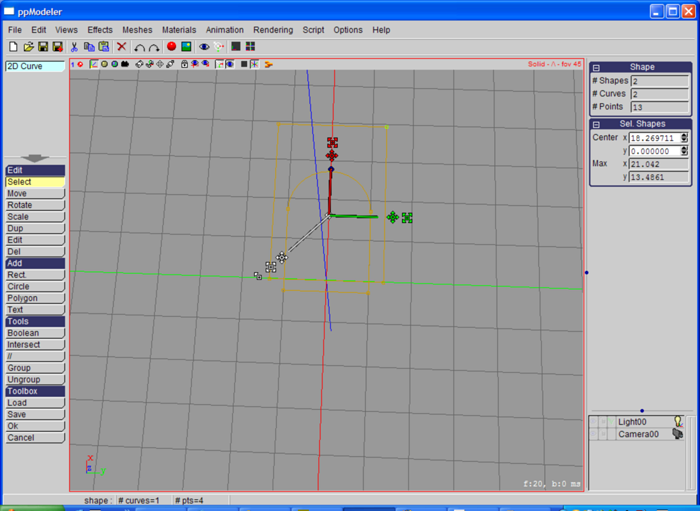
Press the "Boolean" button, and select the wanted operation in the opened window:

"Ok" to perform the boolean operation. Then "Ok" to leave the 2D curve toolbox.
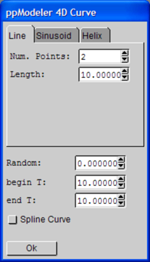
The 4D curve toolbox is opened, unckeck the "Spline Curve" radio button:
"Ok" to close the 4D curve creation, and enter in he 4d curve toolbox.
Don't bother with the strange display. It is because the mesh contains concave polygons:

Press "Ok" to finish the tube creation. In the parameter area (right), lower the "SubDiv1" of the
"Extrude" dropdown box to 5. This operation simplifies the mesh:

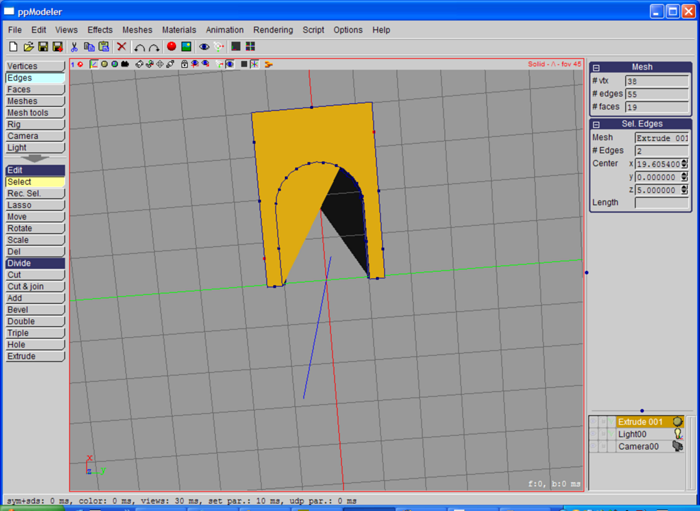
Go to the "Edge" toolbox and select the 2 edges left and right:

"Cut" tool, with 3 parts:
Select the top edge and "Cut" it 6 parts:
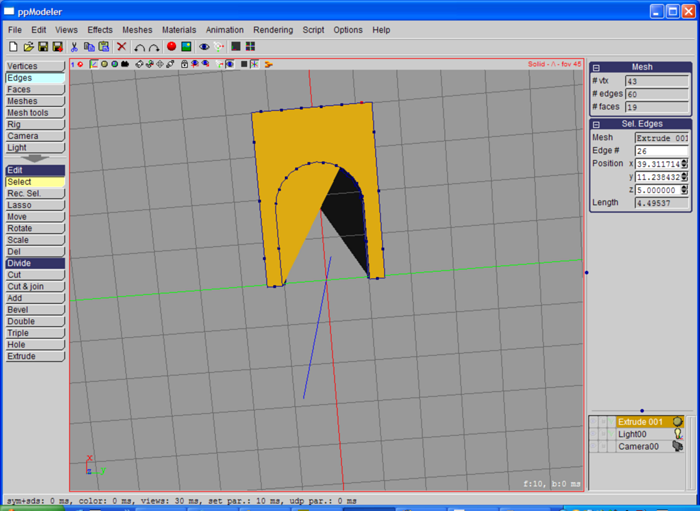
Activate the "Add" tool, and draw edges like below
(the "Knife" tool in the "Vertex" toolbox can do the same) :

Do the same on the other side:

The finished model is here.